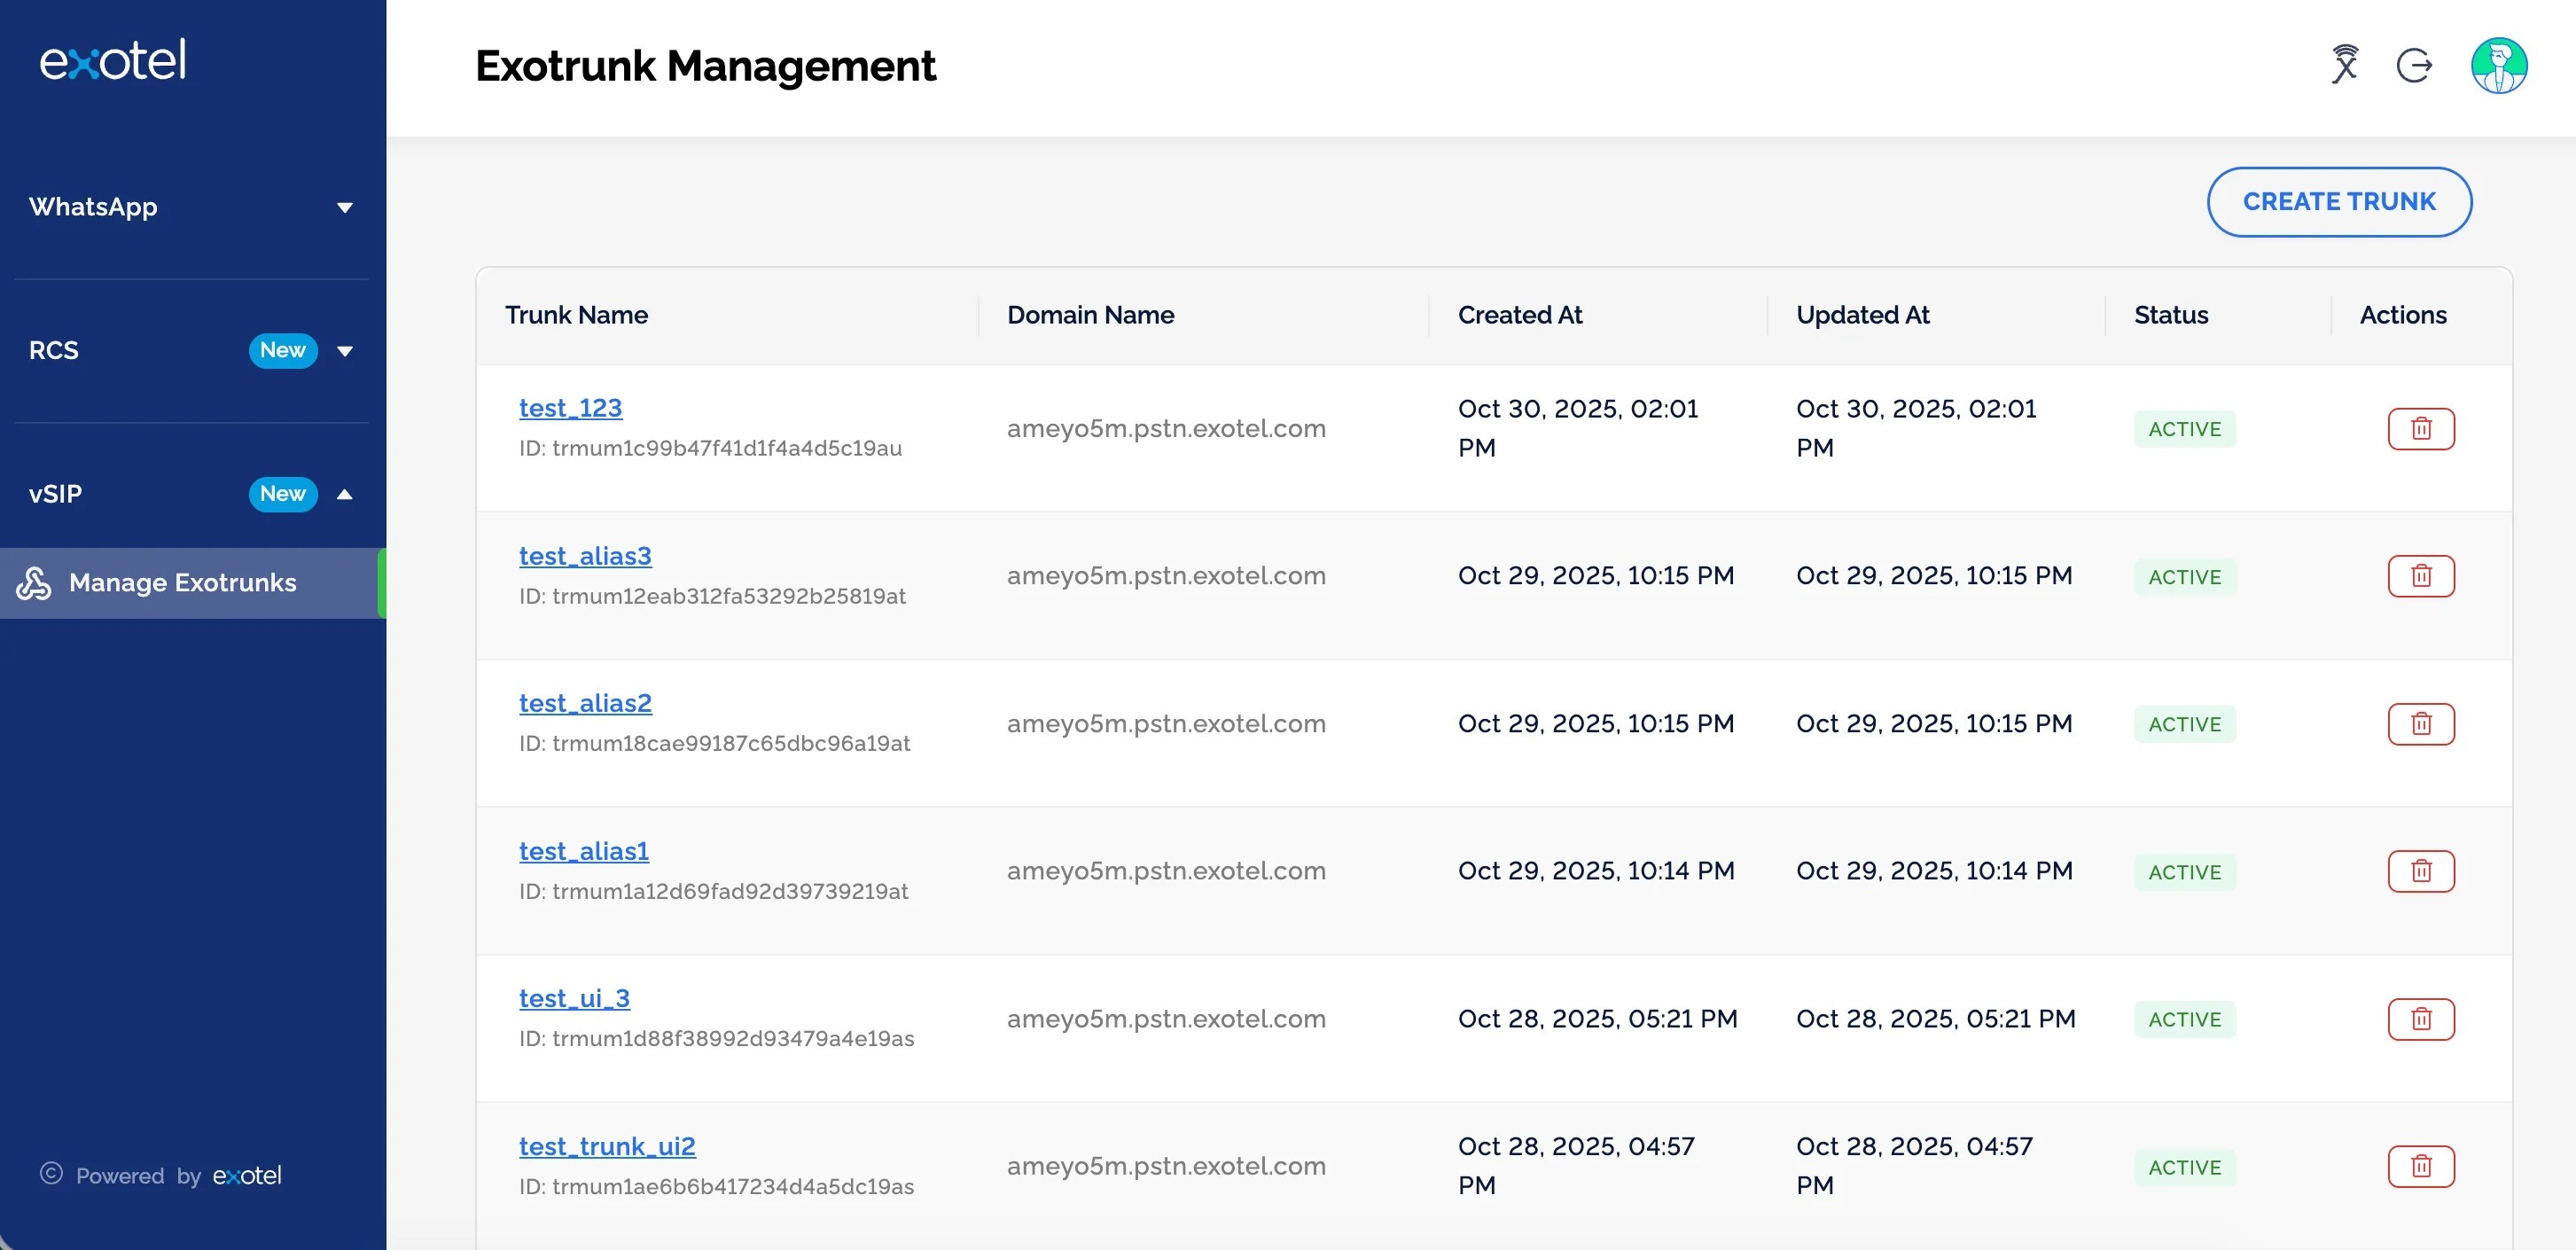
The Exotrunk Management section in your Exotel Platform Dashboard allows you to create, configure, and manage SIP trunks for your account. SIP trunks enable seamless connectivity between your Voicebot provider and Exotel’s cloud communication platform. To access Exotrunk Management, log in to your Exotel Dashboard based on your account cluster.
- Mumbai cluster: platform.in.exotel.com
- Singapore cluster: Currently Unavailable
Use your registered Exotel credentials to sign in.
Exotrunk Managment is a limited access feature. If you are unable to see Exotrunk management feature on your Platform Dashboard please contact hello@exotel.com
Overview
The Exotrunk Management page lists all SIP trunks created within your account along with key details such as:
Field | Description |
|---|---|
Trunk Name | The user-defined name of the SIP trunk. |
Domain Name | The SIP domain through which Exotel routes your traffic. |
Created At / Updated At | Timestamps showing when the trunk was created and last modified. |
Status | The current operational state (e.g., Active). |
Actions | Allows you to delete an existing trunk. |
Use the Create Trunk button on the top-right to add a new SIP trunk.
Creating a New Exotrunk
To create a new SIP trunk, follow these steps:

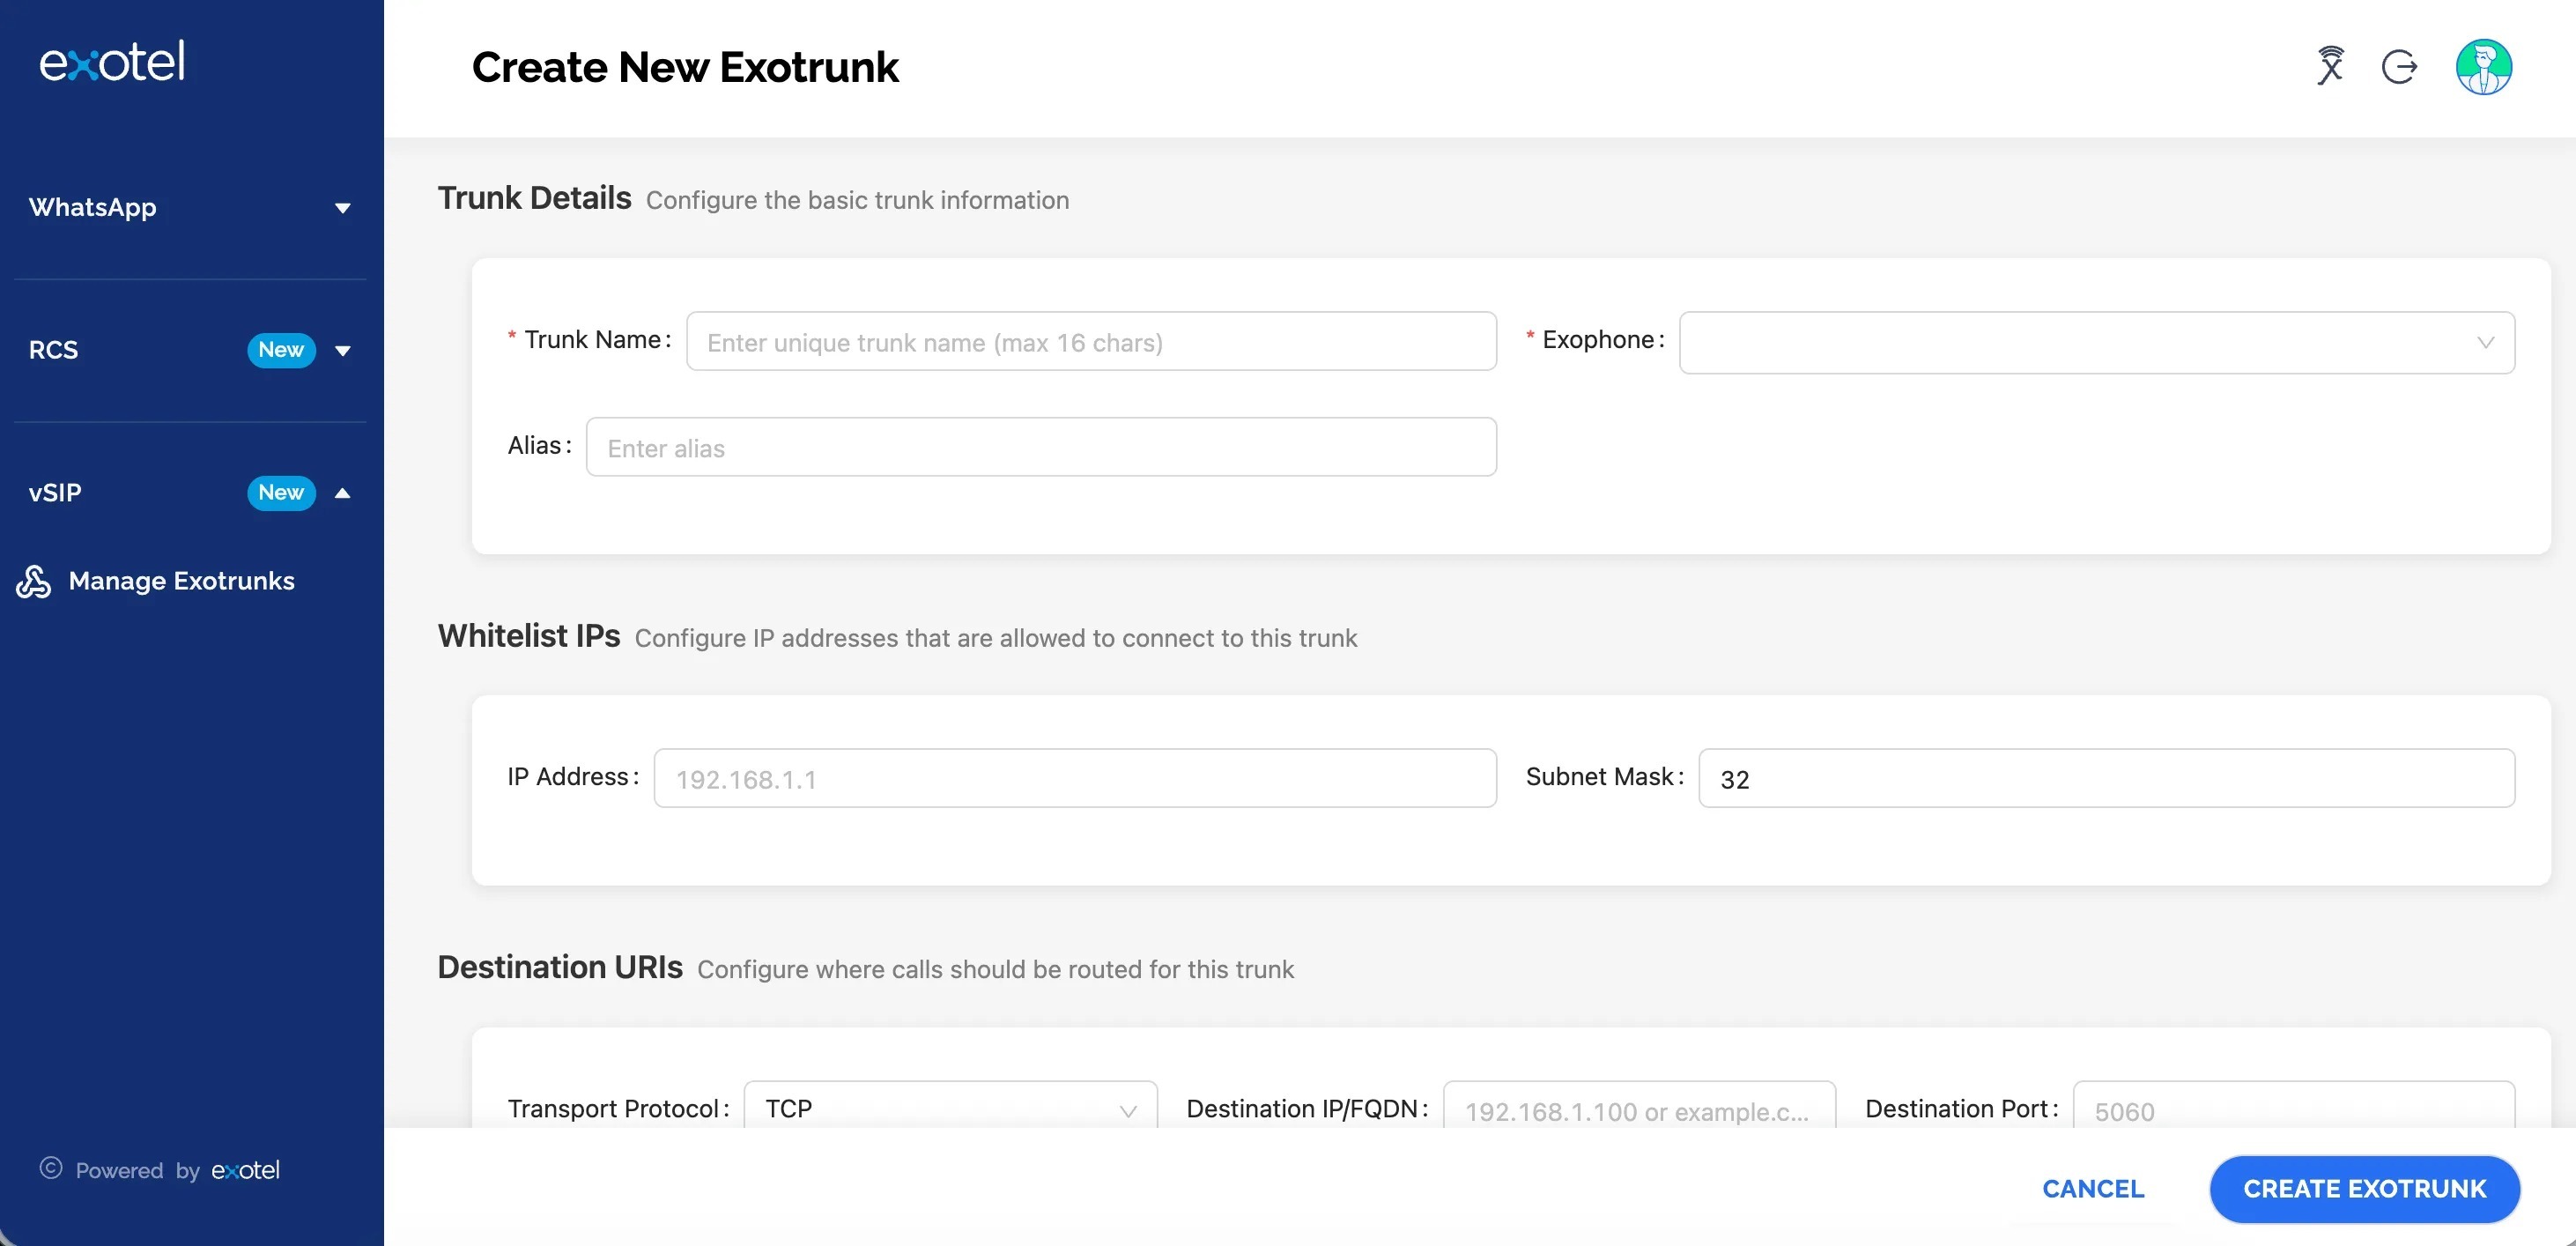
2 Fill in the required details in the Create New Exotrunk form.

Trunk Details
Field | Description | Required |
|---|---|---|
Trunk Name | Enter a unique name (maximum 16 characters). | ✅ |
Exophone | Select the Exophone to beassociated with this trunk. | ✅ |
Alias | (Optional) Provide an alias name for reference. | ❌ |
Whitelist IPs
Whitelist IPs ensure that only trusted systems can connect to your SIP trunk. IP Whiltisting is optional.
Field | Description |
|---|---|
IP Address | Enter the IP address of your PBX or SIP endpoint. |
Subnet Mask | Define the subnet range (default: 32). |
You can currently only whitelist 1 IP range from the Platform Dashboard. To whitelist additional IPs, contact hello@exotel.com
Destination URIs
Specify where calls should be routed for this trunk.
Field | Description |
|---|---|
Transport Protocol | Choose between TCP or TLS. |
Destination IP/FQDN | Enter the IP address or FQDN of your destination server. |
Destination Port | Specify the SIP port |
Click Create Exotrunk to save the configuration.
Viewing Trunk Details
Once created, each Exotrunk has a dedicated Trunk Details page that displays its configuration and status.
Basic Information
Field | Description |
|---|---|
Trunk Name | The name assigned to the trunk. |
Trunk ID | Unique system identifier for the trunk. |
Alias | Alias name, if configured. |
Domain Name | Exotel SIP domain assigned to the trunk. |
Auth Type | The authentication mode used (IP-Whitelist). |
Created / Last Updated | Timestamps of creation and last update. |
Phone Numbers
Displays phone number assigned to the trunk for handling inbound calls. If no numbers are assigned, this section will show:
Destination URIs
Lists all configured SIP destination endpoint. If none are configured, the message will show:
Whitelisted IPs
Shows all IP addresses authorized to connect to the trunk. If none are added, you’ll see:
Managing Existing Trunks
You can manage your trunks directly from the Exotrunk Management dashboard.
Action | Description |
|---|---|
View Details | Click the trunk name to open the full configuration page. |
Delete | Click the trash icon to remove a trunk permanently. |
Next Steps
Once your SIP trunk is created and configured:
- Setup up call flow to define how inbound and outbound calls should be handled.
If you encounter any issue with when managing exotrunks please reach out to Exotel Support with the Trunk ID and error logs for investigation.
